A Look At The Hottest Trends In Laminate Flooring For Sale Today

How to Repair  Common Laminate Flooring Problems

Whether the laminate flooring in your home has been there since before you moved in or you recently installed it yourself, you want to keep it in good shape. Unfortunately, problems do come up sometimes. The good news is that in many cases, you can fix the problem without replacing the entire room’s floorboards. Check out a step-by-step guide in how to repair laminate flooring in the three most common areas.

How to Repair Laminate Flooring: Peaking

If you’ve noticed that the floorboards are pushing up against each other along the seams, creating a lump on the floor that resembles a roof’s peak, the problem is peaking. Peaking occurs when the floorboards don’t have enough space to expand and contract.

To avoid further damage, you should fix the problem as soon as possible.

Find the Underlying Laminate Flooring Problem

Peaking commonly happens when there isn’t an expansion gap between the floor and the walls, when the expansion gap is too small, or if the moldings are attached to the laminate flooring. To find the underlying issue:

  • Follow the peaking boards to the nearest wall.
  • Check for a gap between the board and the wall or any nearby permanent fixture such as cabinets. A 0.25-inch gap usually provides enough space.
  • Check the moldings for any nails or glue that may have attached them to the floorboards.

Fix the Underlying Laminate Flooring Problem

If the moldings are attached to the floorboards, remove the nails or detach the glue.

If the floor doesn’t have an adequate expansion gap, you’ll have to make one. Simply remove the molding and cut a section of flooring between the floor and the walls. Helpful tools include spacers and a jigsaw. Replace the molding. Finished!

Fix the Peaked Boards

The peaking is the main issue. Once you’ve corrected the underlying problem, you can place a heavy object on the peak for a few days or until the boards settle back into place.

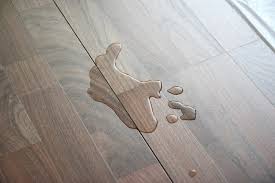
How to repair water damage to laminate floors?

A laminate flooring generally is resistant to water damage, however, it still faces damage due to excess of moisture. But the good thing about laminate floors is that the water damage can be repaired easily without peeling the entire floor. This is because the flooring type is made of many sections that are locked together.

Here we will be discussing about repairing the water damage and drying the floor underneath, which form the part of the cleaning process. And the final step calls for putting down the new laminate in place of the section that is damaged.

Repairing and drying the laminate floors

In most of the cases, laminate floors get flooded when there is a leakage in a dishwasher, refrigerator or washing machine. Other than these, any standing water can cause the damage. The very first thing you have to do is determining the place of damage and fixing it. Once this is done, the floor must be dried well. You can complete the task by mopping or by using a wet-dry vacuum. After drying the excess of water, a fan must be placed on the floor to dry the floorboards beneath before repairing the damaged sections.

You can make use of a circular saw or crowbar to fix the water damage by removing the wet sections. Using a chisel and hammer, start pulling the damaged pieces, ensuring all the while that the surrounding area is not ruined. Next the tongue part of the laminate board must be removed with the help of a knife. After removing the old laminate, put a fan on the floorboards to dry them. This must be done before you add the new material as it will prevent molds from growing in future as a result of moist floorboards.

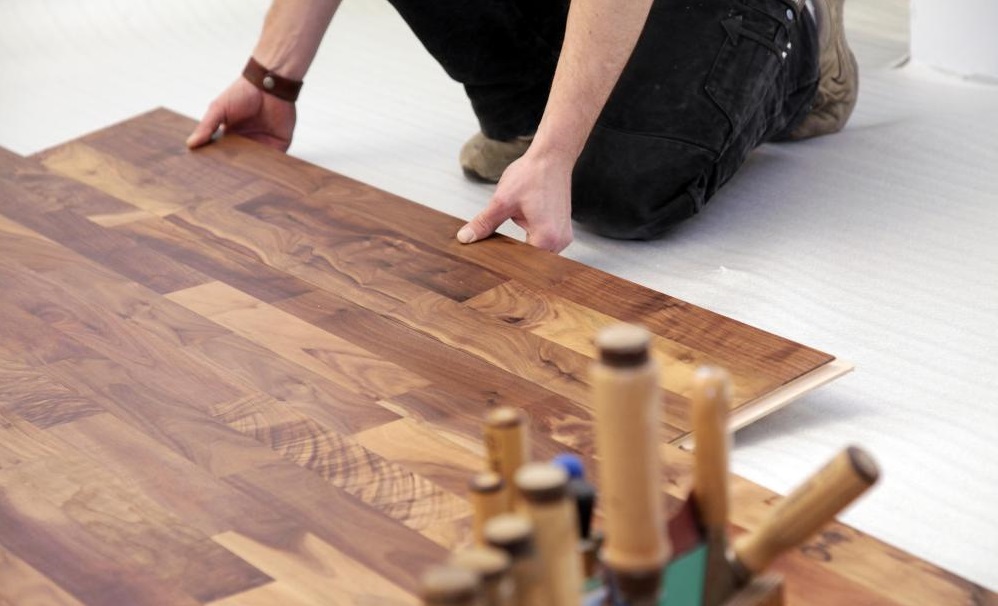
Putting new laminate

Before putting the new laminate down, create a pattern matching the current flooring. Thereafter construction glue must be added. Then you must place the first piece into the right area as per the pattern. Make sure that you wipe off any extra glue before the area dries, and place heavy objects only when it’s fully dry. If you are willing to use nails instead of glue to repair the water damage laminate floors, you will first have to nail the first section of the new floorboard with the existing sections so that it fits compactly.

How to Repair Laminate Flooring: Creaking Floors

While occasional creaks and groans are normal — especially in older homes — regular noises are annoying and may indicate an issue with the floor. You’ll need to assess the situation and determine if you can fix it yourself or if you require professional help.

  • Check Transition Areas

Unless your home has the same laminate flooring in every connecting room, you’ll find transition areas where the floorboards meet another type of flooring such as carpet, tile, or linoleum. Look for transition strips — long, thin pieces of metal or wood — that connect one area to the next. Ideally, your floor should have them.

If there aren’t any T strips, look for expansion gaps in the connecting areas. As with walls and stationary objects, laminate flooring needs space to expand and contract here. If you don’t see a gap, you’ll need to make one, as outlined above, and then install a T strip.

  • Pull Up The Floor

Check for problems beneath the surface by pulling up a board or two. Is there an underlayment pad between the subfloor and the laminate flooring? If not, you can fix or at least mitigate the creaking noises by uninstalling the floorboards, adding a high-quality underlayment pad, and reinstalling the boards. This item absorbs sound and adds durability to your flooring.

  • Examine the Subfloor

Another possible issue is an uneven or damaged subfloor. Look for dips and humps in the floor or areas that feel spongy. Make sure to check underneath any rugs or furniture, too. If you suspect that your subfloor is rotting or uneven, you should contact a flooring professional.

How to Repair Laminate Flooring: Buckling or Warping

You’ll know that you have warped floorboards if they curve inwards like the inside of a bowl. Buckling is the opposite — when floorboards resemble an arch or an upside-down bowl. Water damage or temperature fluctuations are the most common culprits of buckling and warping. If you address the issue quickly enough, you can usually prevent the laminate flooring problems from spreading.

Look For Water Damage

Causes of water damage include:

  • Standing water. It may come from a plumbing leak, an overflowed dishwasher, or from mopping with too much water.
  • High humidity.
  • Moisture from the subfloor.

The first two sources are easy enough to diagnose. To check your subfloor, pull up the floorboards and look for moisture or signs of mold. Also, check for an underlayment pad; not having one makes your laminate flooring susceptible to moisture damage.

Look for Expansion Gaps

Not having proper expansion gaps can cause not just peaking and creaking floors, but buckling and warping floorboards too. If most of the damage is near the walls, your problem is likely due to one of the following installation mistakes:

  • Not acclimating the flooring to the home before installation.
  • Not leaving an expansion gap between the floorboards and the walls, stationary objects, or transition areas.

In either case, creating expansion gaps should fix the issue.

Fix the Underlying Cause

Before you replace the damaged floorboards, you’ll need to fix the underlying cause. This task may involve:

  • Taking care of any plumbing issues.
  • Purchasing an underlayment pad.
  • Creating expansion gaps.
  • Purchasing higher-quality flooring that has a strong moisture barrier. While this step isn’t necessary, you may want to consider it if you have cheap, low-quality flooring that lacks a proper moisture barrier.

Replace the Damaged Floorboards

You’ve almost finished the job! Just follow these last steps:

  • Locate the closest wall and remove the molding.
  • Disconnect and remove all the planks until you reach the damaged section.
  • If there’s water damage, allow the area to dry completely.
  • Deal with any mold on the subfloor. Contacting a mold removal specialist is a good idea.
  • When the subfloor is dry and clean, you can install the replacement floorboards.
  • Reinstall the laminate flooring.
  • Reattach the molding.

You don’t need to completely uninstall the flooring unless the damage is extensive or if you want to add higher-quality floorboards or underlayment. If you have damaged laminate floorboards in the middle of a large room, you may prefer to hire a flooring professional.

Deciding Between Hardwood and Laminate Flooring: Which Is Better?

When investing in a new floor, many homeowners are faced with a choice between hardwood and laminate. The difference between these two types of floors can be confusing at first, which is why we put together a simple guide that compares hardwood against laminate, highlighting the pros and cons of each floor type in terms of appearance, durability, longevity, ease of maintenance and repair, and eco-friendliness.

The Fundamentals

Laminate is a multi-layer synthetic flooring product. It is designed to imitate the appearance of real wood. The core layer of laminate flooring is manufactured primarily from melamine resin and fiber board material. The top layer has an imprinted textured image made to look like real wood.

Engineered hardwood flooring is a type of wood floor that consists of several wood or plywood layers. Bottom and middle layers are manufactured from cross-laid solid wood or plywood planks. The top layer consists of a solid sawn wood lamella, often stained and prefinished in factory setting. Solid hardwood flooring planks are produced from single pieces of wood, can be purchased unfinished or prefinished.

In essence, while solid or engineered hardwood flooring is manufactured from real wood and preserves the unique textured grain and appearance of natural wood, laminate flooring is only an imitation. Although some types of high quality laminate floors might look like real wood, there are far more differences between these products than what initially meets the eye.

Appearance and Aesthetics

In terms of aesthetics, the difference between hardwood and laminate floors is glaringly obvious. Real wood is characterized by tremendous texture variation of the wood grain, which is why no two planks of hardwood flooring, whether solid or engineered, appear exactly alike. In laminate flooring, pre-designed patterns that imitate the look of wood texture, are imprinted onto the floor surface. For this reason, identical patterns are repeated on average every 5 boards.

Although in appearance some high quality laminate floors may look like real wood, repetition is unavoidable, as uniqueness of an authentic wood is impossible to replicate.

Durability

Durability of any flooring surface largely depends on intensity of foot traffic, as well as adherence to manufacturer recommendations in regards to care and maintenance of the floor.

Outer layer of most laminate floors is manufactured by bounding melamine resins and aluminum oxide at high heat and extreme pressure. The resulting floor surface is often harder than that of natural wood. Most laminate floor surfaces are highly resistant to moisture damage, staining and fading. In fact, many reputable laminate flooring manufacturers offer 10 to 25 year warranties on finish.

Durability of an authentic hardwood floor varies depending on finish, manufacturer and maintenance practices. Natural wood is softer than a pressurized composite surface, therefore, it can dent more easily. Solid or engineered hardwood floors can be refinished, renewed and repaired fairly easily, often without the need to replace planks or even the entire floor, as is the case with damaged laminate flooring. For example, in the event that an oiled wood floor plank is damaged, it can be fixed by manually sanding down the affected area, then simply applying more stain and oil. With laminate flooring, simple DIY spot repairs are not possible.

On some types of hardwood floors, such as those with wire brushed and oiled finishes, minor surface dents and scratches seamlessly blend in with the existing look, emphasizing the unique appearance and depth of wood texture.  Once scratched or chipped, laminate flooring surfaces will show the damage.

Moisture

Wood is an organic, “breathing” material that responds to fluctuations in humidity and temperature. For this reason, solid and engineered hardwood floors should be installed in interiors where humidity levels are monitored and kept at 45-55% for solid and 45-65% for engineered floors.  Although engineered hardwood floors have superior dimensional stability, most wood floor manufacturers do not recommend installing them in bathrooms or kitchens – areas, where temperature and humidity can fluctuate significantly. In warm and humid climates, such as Florida, hardwood flooring that is multilayer or engineered is preferable over solid.

Laminate floors have high resistance to moisture and are often used for kitchens, bathrooms, and basements. Nevertheless, it’s important to carefully read the manufacturer warranty and recommendations in order to avoid costly mistakes.

The Need For A Personal Injury Lawyer

Things You Need To Know About Personal Injury Law

Personal injury cases are complex in nature. If you’ve been involved in such an accident, it is imperative that you’re reaching out to a personal injury attorney as soon as possible. There is nothing stopping you from filing the case on your own but there are no guarantees that you will get what you’re looking for. In order to increase the chances of the claim being settled in your favor and getting maximum compensation, you will have no other option but to look for an experienced attorney. There are some things you should know about personal injury cases and we’re going to highlight some of them for you. When you suffer from a private injury, it’s best to rent a personal injury lawyer who can guide you about the method of creating a successful personal-injury claim. Regardless of the circumstances of the private injury, hiring a personal injury lawyer is very recommended because therein way you gain awareness about your rights and are led the proper way. You will get experienced personal injury attorney at injury law firms.

They’re More Than Just Car Accidents

Personal injury cases are usually associated with car accidents. This is because accidents form the majority of personal injury cases. A personal injury case will apply when a person suffers physical harm which is the result of someone else’s negligence. You can also file a personal injury lawsuit for defective consumer goods, dog bites, wrongful deaths, and unsafe premises.

Offers Are Not Always Fair

Even if you’re using an attorney, there is a high chance that you might not get what you’re looking for. If you choose to represent yourself, you might end up not getting the compensation that you deserve for your pain and suffering endured. Insurance companies have attorneys and accident reconstruction specialists and will do everything in their power to ensure that they’re paying as little as possible. You will not be doing yourself any favors if you don’t have an attorney by your side to aggressively fight for your rights.

Getting An Experienced Attorney Matters

The attorney you choose will make a big difference in the outcome of your case. You don’t want to be working with someone who is just from law school. If you’re a victim of a serious injury, you could be facing thousands of dollars in medical expenses. Since it is a long-term injury.

Compensation Is Extensive

There are several different types of compensation that you can get from a personal injury case. The money for compensation will include:

  • Property damage
  • Loss of earnings
  • Pain and suffering
  • Past and future medical expenses

A good attorney will ensure that all these factors are being taken into consideration when coming up with the final compensation package. For a wrongful death case, compensation can include:

  • Loss of consortium or companionship
  • Funeral and burial expenses
  • Loss of financial support and benefits
  • Related medical expenses incurred prior to the death of the deceased

No One Case Is The Same

Every personal injury case is different, so you can expect different outcomes. The basic fundamentals are shared across the board and you can expect similarities in cases but they are never the same. An attorney will have to tackle each new case with a fresh perspective. It will be ignorant to make assumptions just because cases are similar to the surface.

Common Mistakes Personal Injury Clients Make

Worrying that a court hearing will involve a jury.

A civil claim, like a personal injury claim or clinical negligence claim, in the unlikely event that it goes to a trial, will be in front of a judge, not a jury. It’s not scary. I estimate that only 1% of claims go to trial – and these are usually the enormous claims or ones where the insurers sense that the claimant hasn’t been entirely truthful.

Assuming that your lawyer always has your case in their mind.

If only this was true. A personal injury lawyer may have over 200 clients at any one time, depending upon how complex the claims are and how much help they have. Some unqualified paralegals have 500 claims (usually road traffic accidents). My recommendation is that a client should frequently engage with their lawyer, nudging the lawyer if the lawyer appears to have forgotten them. Incidentally, if you become aware that your case handler has a ridiculously high number of claims to deal with, you should look into switching to another firm of solicitors.

Thinking your question might be stupid so not asking it.

Some adverts suggest that making a personal injury claim is easy-peasy, so you might feel you can’t ask a question because your lawyer will think you are thick! Do not think like this. This is your claim and you have a right to know what is going on. It isn’t your day job to understand this area of law. Ask, ask, ask. I bet your lawyer couldn’t do your job. Personal injury law is really complicated. Frequently my team of brilliant lawyers will disagree on a point – which proves that there aren’t always black and white answers to questions. So feel free to ask your lawyer.

Assuming a compensation claim will be easy.

I never tell my clients this because it rarely is all that easy. Sure, some claims, particularly road traffic accidents, can be fairly straight-forward, but most claims have their complexity. And I never think that bringing a claim against an employer is easy. It is something that you need to think about carefully. You never know, when you bring a claim, whether you will need to go to court to give evidence as a lawyer cannot know how the other side will approach your claim. Discuss the advantages and potential disadvantages of bringing a claim.

Failing to keep key evidence.

OK, so you have had an accident, the first thing you should do after you have looked after yourself is to gather evidence. See the accident scene as a murder scene. Preserve evidence. If you have a mobile phone with a camera, take numerous photos and video. Write everything down. Speak to every witness who is there because witnesses are often reluctant to help you out a few months later. What are the conditions like? Where were the bushes and tree obscuring your view? Were the streetlights on? Which direction was the sun coming from? If you have had a car accident, take photos of the positions of the car, if you can. Get paperwork. Be forensic because, as a claimant, you have to prove that someone else’s negligence caused your accident. You may not choose to bring a claim, but if you haven’t gathered evidence, then you may make any claim much harder to bring.

Qualities to Look for in a Personal Injury Attorney

Bad things happen to good people, unfortunately. Certain events in life can be frustrating, and loves can change in an instant at the hands of someone else’s negligence. The Ticktin Law Group personal injury attorneys can help you. Whether you were injured by a distracted or drunk driver or experienced an injury in a slip and fall on someone else’s property, we have your back.

When dealing with a personal injury, you need a qualified personal injury attorney to represent your best interests. Take a look at these qualities that you should look for in a personal injury attorney:

Legal Advice and Compassionate Care

Your personal injury attorney should not be strictly business, but also caring and helpful. The best personal injury attorneys are motivated by the opportunity to solve problems for those who have been hurt. Good personal injury attorneys keep the best interests of their clients in mind at all times. This often means working long hours, doing research, meeting with clients and their families, and generally going above and beyond to reach a successful settlement.

Respect of Their Peers

When choosing your personal injury attorney, you should look or lawyers who have earned the respect of their peers. Also, pay attention to the groups they are involved in – like local, regional, and national groups, or listings, and journals. This respect comes with consistently providing successful results and accumulating experience in the field.

Experience and Ability

Look at your potential personal injury attorney’s track record for settlements and verdicts that they won. Those who have the knowledge and natural talent to handle your case are best positioned for success without the need for a long, drawn-out court battle.

Availability

Finding a personal injury attorney who truly cares about you and who will make the time to be available to answer your questions is very important. Your attorney should go the extra mile to educate you on the legal process and explain the process.

Clients Want Someone Trustworthy

Just like you, clients don’t want to get into business with someone they don’t trust. Thanks to misinformation, there’s already a pervasive mistrust of lawyers, and personal injury attorneys in particular.

Trustworthy attorneys are those who have a good track record with previous clients. Most people shopping for an attorney will rely on previous clients who they believe will be truthful about their experience. To gauge the reputation of a law firm, clients will generally browse reviews of the business online on sites like Yelp, Google, or Avvo.

To ensure that prospective clients see you as trustworthy, take care in managing your online reputation. It goes without saying that it is important to remain in good standing with your state bar.

Clients Want an Expert

No, clients don’t care what articles you’ve written – in most cases they wouldn’t know where to look for those. They simply want to know if you have the experience and clout to win their case.

For this information, clients will browse your website for past cases; it helps to mention specific settlement dollar amounts. They may also look to your blog, to learn more about your legal interests. If you have received any awards relevant to your work as a personal injury lawyer, include them on the home page.

Clients Want an Effective Communicator

Clients have a hard time relating to someone who only speaks “legalese.” They want a lawyer they can understand, who answers their calls, and keeps them informed on the status of their case.

Prospective clients will be able to see your communication skills in your blog or in any videos you have online. If you don’t have either, you might be missing out on attracting new clients to your firm.

Your past clients will be likely to mention your communication skills or lack thereof in their reviews. Making your clients feel heard and understood often falls to your staff. It’s important to train your employees in effective communication skills.

When Do I Need a Personal Injury Lawyer?

Generally, anyone who sustains an injury can benefit from a personal injury lawyer’s guidance and advice. However, there are some cases in which it is strongly advised that you talk with a lawyer as soon as possible. Cases that indicate you might need a personal injury lawyer include:

  • Cases involving multiple parties who could share liability for your injuries and damages, such as a commercial truck accident or a defective medical device claim
  • Claims involving government entities, including car accidents with government vehicles, trains, or buses
  • Injuries that result in permanent impairments and disabilities, including cases involving catastrophic injuries
  • Cases that involve product liability laws or premises liability laws
  • Claims for childhood injuries, including birth injuries and daycare cases
  • Cases involving claims of comparative fault
  • Injuries arising from medical malpractice claims
  •  

If you are unsure whether you need a personal injury lawyer to represent you, it is wise to talk with a lawyer before making decisions regarding your case.

Posted inLegal

Local Moving Tips For Relocating Your New Office

LOCAL MOVING GUIDE

A tentative final bill of local moves is estimated using a simple formula:

(Number of movers + truck) x number of hours = final priceEstimating moves is an inexact science. Many variables factor into how long a move will take. A professional moving estimator uses his experience from doing similar moves in order to figure out how many hours the move will require. His estimate includes the amount of time that will pass from the moment the truck first leaves the mover’s garage until it returns after the job is finished. He will then add in the cost of boxes, Packing Tape and other packing materials, extra insurance/valuation and known incidental costs, such as road and bridge tolls.One of the most important things that you should do before you move is to have complete knowledge of your new neighborhood, apartment complex, and the route to your destination. With local moves, time is everything. You can save hours off of the moving time if you can recommend a quicker route to your destination than the one your mover was expecting to take.

Always have a person accompany the movers during the packing and loading processes. This will keep their attention squarely on the job at hand. It will also help keep you informed, just in case your furniture needs to be disassembled, and you’ve been standing in your new home wondering why the movers are two hours late.

Check your new area for the availability of suitable parking for the truck – one that will allow the movers to comfortably load and unload your items. Double-parking means the truck has to round the corner every so often and you’ll be incurred additional charges.

Know all of the restrictions. Most big buildings, especially in city areas, allow moves only between 9am to 5pm. Remind your movers to provide the necessary certificates of insurance. These documents protect the building against damage. Building superintendents will not allow entrance without them.

The availability of suitable elevator units for apartment moves is a very important, especially ones large enough to hold your biggest pieces of furniture. This will definitely save you time and money. But it will also save the movers the time and effort of carrying heavy furniture up the stairs and also from disassembling your furniture.

In order to keep the cost of your move as close as the estimate, the estimator assumes, in every situation, the following:

You will not need additional supplies to be provided by the movers.

You will have packed everything yourself that you had anticipated.

The scope of the work does not change markedly on the day of the move. In other words, you didn’t forget to tell the estimator about important (and heavy) stuff, such as:

The lawnmower your neighbor borrowed from you.

The unknown contents of your filled storage space.

The “priceless” junk in the basement you found under the tarp- the stuff that your wife was hoping would be left behind “by accident.”

Traffic from your old home to your new will not be worse than usual.

MOVING CHECKLISTS

The first night in your new home is exciting and busy and maybe even a bit overwhelming. The last thing you need is for it to feel chaotic. After all of your planning and decision making for this move, you can finally start to relax and enjoy your new house. Before that first night arrives, you’ll want to have all of your essentials close at hand. A first night moving kit may be the single most important box in your move. It is no doubt a must-have for a smooth transition for everyone — including pets in your household!

The most important thing to know about your first night moving box is that it should travel with you, especially if you and your family are arriving at your home before the movers.

If that’s not possible with your type of move (e.g., you’re flying or don’t have enough room in your car), this kit should be the last box loaded on to the moving truck. The purpose of the first night box is to have what you need where you can easily get to it, when you need it.

What Is A First Night Box?

Your first night box contains everything you will want to easily access the first day and night you spend in your new home. The first night kit does not need to be a box; you could choose a suitcase, plastic tub, or even a storage trunk depending on what you need to pack. Remember, you may not be able to find everything you need quickly in all the boxes you’ve just moved. Don’t let your boxes bully you! Take charge of your first 24 hours and create enjoyable memories in your new space.

It’s especially important to prepare for your first night’s stay well ahead of time when you are moving with children and/or pets. It’s no fun scrambling to find your son’s sacred sleep time teddy bear or your dog’s calming toy after you’ve just moved.  After such a busy day, everyone involved in your move will likely be a little restless and hungry. Organizing and separately packing personal items and a few household necessities will dramatically reduce the stress level.

The checklists we’ve developed for your first night covers everything from sleep machines, electronics and chargers to toilet paper, linens and cleaning necessities. We’ve thought of everything, so you don’t have to. It’s important to enjoy your first night and feel a sense of accomplishment. Searching for a clean bath towel or your comfy pajamas puts a damper on the excitement of your first night in your new home.

Moving Guide

6-8 Weeks Before Moving:

This is a great time to begin the details of your move.

1. Make a list of items you plan on moving to your new home and items you wish to take to storage. Make a list of items to be handled by the mover and those you will handle yourself. Dispose of the items that you do not need and consider a garage sale if you have time.

2. Get estimates from several moving companies.

3. Research and select a professional moving company. After selecting your mover, discuss costs, packing, timing and other necessary details.

4. Many moving expenses are tax deductible, so maintain a file with important information and receipts for moving related expenses.

5. If moving to a new community, find out about the schools, parks, recreation, and community programs from the local Chamber of Commerce or Visitor’s Bureau.

6. Transfer medical, property, fire and auto insurance through your insurance agent.

7. Place all your medical records in a safe place. Do not forget prescriptions, vaccination records and other important infomation.

4-5 Weeks Before Moving:

1. If you are planning to do some part of the packing, start collecting moving and packing supplies. These can be purchased from your self storage or moving company.

2. Contact the post office and fill out a US postal change of address form and provide your new address to your telephone company, trash company, cable / satellite, water, electric company, internet provider, insurance companies, banks and financial institutions, clubs, local government agencies and any other utility companies.

3. Register your children in their new schools. It would be a good idea to involve kids in the moving process. They can help pack their toys and items from their room.

4. Contact utility companies – electricity, gas, phone and others for disconnection after your scheduled move out. And call ahead to have utilities connected to your new home.

5. If you have pets make arrangements for transportation. Find out if there are specific requirements for pet ownership in your new township. Also obtain the veterinarian records.

2-4 Weeks Before Moving

1. If you have young children, you might want to arrange for a baby-sitter on moving day to ensure they remain safe during the loading process.

2. Remember to return library books and anything you have borrowed. Also collect items you have loaned out.

3. You may NOT want to pack your valuables in the moving van, think about taking them with you.

4. Plants – some state laws do not allow moving house plants. Plants could be given to friends or perhaps a local charity.

5. If you are going to travel by car, you may want to get the automobile serviced prior to your departure.

6. Start packing items you don’t currently need. If renting a storage unit, determine which items go to storage and which items go to your new home.

7. Don’t forget anything in basements, attics, and closets. Don’t forget about clearing out safety deposit boxes.

8. Disassemble your computer and back up important computer files. Avoid exposure to extreme temperatures.

9. Dispose of inflammable items like fireworks, cleaning fluids, matches, acids, chemistry sets and other hazardous items.

1 Week Before Moving

1. Make sure your items are labeled: ‘fragile’, ‘load first’, ‘load last’, and ‘do not load’. This is important to ensure the safety of your items.

2. Ensure that your moving company knows the correct address and phone number your new home. If possible, also provide them with an address and phone number to get in touch with you until you get to your new home.

3. It is important to empty, defrost and clean your refrigerator at least a day before moving.

4. Make plans flexible, make arrangements in case of delays. Confirm travel arrangements and keep items you will need while the rest of your belongings are in transit.

5. Pack a box separately with the things you will need immediately upon arriving at your new home. For example- snacks, disposable plates and cups, bathroom items and trash bags.

Moving Out Day

1. Thoroughly check your closets, drawers, shelves, attic, and garage to make sure nothing is left.

2. Turn off all the switches and lock all doors and windows.

3. Be around throughout the loading process. Inspect the premises and see to it that nothing is left behind.

4. There must be someone to direct the movers. The driver must have in writing your name and phone number. Also remember to take destination agent’s name, address and contact number.

5. Be patient if you reach your new home before your mover.

6. Sign the bill of lading and make sure your new address and phone number are correct.

Moving Guide

Hiring A Moving Company

If you plan on hiring a moving company, you might want to do some research first. Please review the sites below for more great information about moving and to find a company whose services fit you best.

What Do I Look For When Hiring A Moving Company?

The American Moving and Storage Association (AMSA) offers a Certified Mover Program for moving companies throughout the United States. This program consists of professional movers that have agreed to follow “Code of Conduct,” by responding to customers both ethically and in a timely manner.

This group of movers offers:

Efficient and reliable transportation of household goods

Storage of household goods

Professional service

Prompt customer service when dealing with complaints

Arbitration

Moving Yourself

Some homebuyers choose to move themselves and their belongings. It you want to save time and money by taking on this endeavor yourself, be sure that you have ample packing supplies. Please review the sites below for some informative resources about purchasing boxes, bubble wrap, labels and tape.

Rent a Crate

Uline

All Boxes Direct

Dial a Box

Packaging Price

The Day Of The Move

The day has finally arrived! As excited as you and your family maybe about your new home and its surroundings, moving can make everything seem uncertain. It is important to take a deep breath and try not to be stressed.

Here is a list of important things you should remember when your moving day arrives:

Designate specific items that you need, that should not be packed with the rest on your belongings.

If you have children, make sure that they have at least two special items to take with them for the trip.

Make sure you remove all trash from your current residence.

If you are using a moving company or friends and family, specify certain unloading areas.

Make sure there are ample walkways for moving large pieces as well as boxes of your belongings.

If you are using a moving company, reiterate those specific items that need special attention and handled-with-care.

Remember to meet the needs of those helping in your move by supplying them with food, beverages and restroom facilities.

Lastly, if you are using a moving company, please remember to read and sign all paperwork, documenting anything that transpired during the moving process.

This Relocation Guide with A Free Moving Checklist Will Make Your Life Easier

You know that moving can be the most stressful events in anyone’s life. It’s on the top tier along with planning a wedding or giving birth for the first time. This relocation guide and free moving checklist is going to make the process that much easier! We’ve created a full relocation guide and a downloadable moving checklist for you to use for when you’re ready to relocate. Things that you’ll need to do before, during and after your move

While there are some variables that will fluctuate the cost of moving from year to year, there are other factors that are much more predictable. Understand how the distance, time of year and size of your household will impact your move.

Traveling Distance

No matter how you move, you’ll need to get yourself, your family, and your belongings from point A to point B. While it may seem obvious that the cost of moving increases the more miles you travel. some buyers don’t consider this factor until the move is in progress.

Understand that the distance you’re traveling is directly proportionate to the amount of money you’ll spend and do your best to estimate these costs ahead of time with movers or moving truck rental companies.

Time of Year

Your real estate agent probably told you that the time of the year can affect the price your home sells for. You probably didn’t know that the time of the year can also impact the amount of money you’ll spend on moving. While it might seem like it would be more expensive to move in the wintertime, this is actually the most affordable time to move.

Tips For Hire The Best Wedding Videographer

What questions should you ask a wedding videographer?

Your wedding video is something you will treasure for many decades (and, hopefully, watch many times during that period), so you want it to reflect your style as a couple – and give anyone watching it a true picture of what your big day was like.

The do this, you must not only find a wedding videographer who is great at what they do but also one that suits you and your partner’s style and personalities.

Obviously, the overall look and feel of your final wedding video will depend on your budget and the videographer you choose, but here are some questions every couple should ask potential wedding videographers before signing on the dotted line.

Are You Available On Our Wedding Date?

It may sound obvious, but many videographers are booked months, if not years, ahead, especially the really good ones. So, before you launch into your questions and ask about their offerings, find out if they’re even free on your wedding date.

What Is Your Style Of Videography?

If you’re at the stage of speaking with a wedding videographer, you should already have perused their portfolio to get a rough feel of what their story-telling style is because there is no such thing as a standard wedding video and not every style suits every couple.

Perhaps you prefer wedding videos shot in the cinematographic style of a movie? Or, maybe, you’re partial to a fast-paced news style or a slower, more documentary style where your love story will unfold? You’ll only know what style your potential wedding videographer shoots if you’ve watched their show reels and/or videos of previous weddings.

If you like their general style, but want something a little different, don’t immediately discount them. Ask the question: what other styles can you shoot in?

Why? Because they may have multiple camera operators and editors who can shoot and cut video in your preferred style even though their show reel doesn’t necessarily reflect it.

What Is Your Videography Background?

Following on from the previous question, ask about your wedding videographer’s background because they can be quite diverse, from self-taught practitioners who are true video artists to those trained at film school or at a TV station or on a film set.

Your videographer’s background will affect their style of videography, but also how they do things overall. It’s wise to ask about sort of training and experience the person you’re putting in charge of recording your big day has.

How Many Weddings Have You Filmed?

No matter how experienced your videographer when it comes to filming and editing, you definitely want to know how many weddings they’ll have filmed prior to your own big day.

Filming a wedding is vastly different from filming, say, a TV commercial or a film. Weddings are about capturing certain key moments and conveying the feel of your big days and telling a story. You want to know that your videographer, no matter how technically perfect he or she may be, will be able to read the mood of your event and, of course, record your big day without missing out on key moments.

This only comes with experience, so you probably don’t want your wedding to be a videographer’s first job.

Can i see a full-length example of one of your wedding videos?

All good videographers show multiple short example videos on their websites, like little trailers to promote their films. But, like a film trailer, only the very best bits of the longer, main video are used. What you need to make sure is, if you book this person to film the most important day of your life, the rest of your video will be the same standard as the stuff used in the trailer/sample video.

Have You Ever Worked With My Photographer?

Both your videographer and photographer will both be trying to capture the same moments so they’ll need to work together to avoid getting in each other’s way. If they haven’t had experience working together before, make sure they are put in touch to co-ordinate beforehand. Often a photographer or videographer will be able to recommend someone they’ve worked with and trust in the past.

Is There A Travel Charge For My Wedding?

Why You Want to Know: You want to make sure there are no additional fees on top of the package you’ve selected. Some videographers will have a trip charge based on how far away your venue is from their home base. Make sure you’re aware of these charges before you book.

How Well Do You Work With Other Vendors? Such As The Photographer?

Why this is a good question to ask: Your videographer has a very important role to play on the day of your wedding. They will need to interact with multiple vendors, such as the photographer, DJ, and wedding coordinator, in order to deliver you the best wedding film. The photographer and videographer will work closely throughout your wedding day to film all of the highlights of the day. They will also need to work closely with the DJ in order to capture all of your important speeches, such as the ceremony, vows, toasts, etc. Because of this, you’ll want to make sure your videographer is a people person and can work well with all vendors.

Can I Choose The Music For The Film?

Many videographers are more than happy to do that, so have a discussion with them and have a list of favourite tunes at the ready. If they can’t use your exact song selection they might come up with great alternatives along the same vibe.

Who Will Own The Copyright?

This is important as any additional copy will have to be paid for separately.

How Many Copies Of The Film Do I Get? And How Much Does It Cost If We Want To Buy Extras?

If you want to distribute the video to all your relatives abroad, you may want to find out how much an extra video costs before you make any promises!

How Far in Advance Should I Book?

If you already know that you want a wedding videographer, it’s best to start the search early on in your engagement. You’ll want to have time to research different vendors and ensure that they have your wedding date available. In addition to asking about availability, ask how far in advance you should book.

Due to their demand, popular videographers may book out far in advance, which means that it’ll be necessary to make a decision fairly quickly. You don’t want to get through your consultations and come to find out the person you want to work with isn’t available to shoot your wedding.

How Is Pricing Decided?

One of the main wedding videographer questions is how pricing works. Pricing for videographers runs the gamut, with some being hourly and others offering packaged services. Expenses start in the hundreds and quickly run into thousands of dollars, based on experience, quality, and demand for the videographer you’re interviewing. Walk through his or her pricing model and ask what’s included. Things to note are:

  • How many videos will you receive?
  • Will you get a digital copy and a hard copy?
  • How many hours are included?
  • Is there an additional fee for a second videographer?

There are various factors that could alter the amount of work your prospective videographer needs to do, which, ultimately, will alter the price. Once you’ve decided on a wedding videographer you like, make sure you read through the contract thoroughly and ask any additional questions to ensure that you know exactly what to expect.

What Buyers And Sellers Should Know About Home Inspections

Home Inspection Checklist: What Buyers and Sellers Should Know About Inspections

A home inspection is an essential step in the buying process. It makes sure that buyers aren’t getting themselves into a contract to purchase a house that will be an expensive mistake. For sellers, it can be a cause for worry, because it could lead to costly home repairs before they can sell the home.

However, there is no such thing as a perfect property. A home inspection will almost always discover some issues that need attention and could lead to further negotiation. That being said, it is likely that many of the defects found by the inspector will be relatively minor—things that could be quickly and inexpensively fixed, and aren’t going to make the buyer worry.

Whether buying or selling, it is essential to understand the FAQ about home inspections. You should have a firm grip on what to expect, as it will be a critical aspect of having success. The article at Maximum Real Estate Exposure covers the entire process of a home inspection from start to finish, including negotiations.

Home Inspection Checklist

There are 12 primary areas a home inspection will focus on:

Structure

Foundations

Walls

Floors

Ceilings

Doors and windows

Basement

Attic

Roof

Plumbing

Electrical

Heating

Air conditioning

Advice for Sellers

When you are selling your house and the buyer has arranged an inspection of your property, there are a few things you should do to make the inspector’s job a little easier. You never know, some kindness towards the person checking over your home could make them look slightly more favorably towards your property—or, at least they won’t be in a bad mood when reviewing your home

Home Inspector Practice Test

The National Home Inspector Examination (NHIE) is designed to evaluate the competency of home inspection professionals to make sure they have the knowledge and understanding necessary to provide valid home inspections. Twenty-nine states currently include the exam as part of their licensing requirements. The exam is administered by the Examination Board of Professional Home Inspectors.

Does the Exam Vary by State?

For most states, you can register online or by phone with the test administrator, PSI, to take the exam at any of the 250 test centers located throughout the United States. Exam results are accepted in every state that requires the exam for licensure.

What is the Exam Fee?

The fee for the National Home Inspector Examination fee is $225 in most states. You will be required to pay the fee when you register for the exam. You may reschedule or cancel your exam with no penalty if you do so at least four business days before the exam date.

What Do You Need on Exam Day?

You will receive a reporting time for your exam. Plan to arrive at least 15 minutes early to your testing center. You will need to bring your confirmation number, two appropriate forms of signature identification, including a photo identification.

What Is the Exam Format?

You will take the exam on a computer. It consists of 200 multiple-choice questions. You will have four hours to complete the exam and will have time before the you begin the exam to become familiar with the computer system.

Preparing for a Home Inspection

Home Inspections

So, YAY! If you’re selling your home and you have questions about the inspection, there’s a good chance you’re already under contract!  Congratulations! Or maybe it’s that you’re just as Type A as I am and you’re doing all this research WAY in advance because, well, you can’t help it.  In which case, I’m so sorry

Any inspections will typically be scheduled by the Buyer or the Buyer’s Agent.  Once scheduled, it is your responsibility  to ensure that the home is available for the inspection.   The inspection will take roughly 2-4 hours depending on the size and complexity of the home.  The Buyers and their agent will typically meet with the inspector at the end of the inspection so that they can highlight their top findings and show the Buyers some of the workings of the home.  We typically encourage our Sellers to leave the home during the inspection, to give the inspector and the Buyers a bit of privacy.  That being said, there may be circumstances that require you to be home during the inspection, for example, if you work from home.  We get that.  If this is the case, please give the inspector and the Buyers space.  Remember, they are going to be discussing flaws and items that need repair, and doing that in front of you is… ummm… AWKWARD!   Be respectful!  If they are not able to get all of the information they need , they may walk away from the deal.

What can YOU do?

You want your home to show in the best possible light during the inspection, and normally, that doesn’t just “happen”.  It takes a little bit of effort on your part

Keep the Home in Showing Condition

I think I just heard Sellers all over the world sigh.  I know this is tough; you have kids, dogs, and an upcoming move that get in the way of keeping your home spotless.  But do your best to keep your home in showing condition.  You want the home to be as clean and inviting as possible.

Open Up

What do I mean by this?  Well, if you have locks on your electrical box, your gates, or storage areas, you need to either leave these unlocked on the day of the inspection or at the very least provide well labelled keys.  This includes providing any keys for fire pits or fireplaces, and ensuring that the pilot light is on.  If the inspector can’t access something, they will make note of this in their report, and you can rest assured it is going to make the buyer uneasy.  They may even try to stick you with the inspectors fee to come back out and inspect that area.   Also, if you have a security system, make sure that it is off for the inspector.  You don’t want them to start their inspection in a bad mood because the alarm went off, trust me!

Sellers guide to preparing for home inspections

Competition is high in the real estate market…so how do you best prepare your home for sale, ensure it stands out from the crowd and attracts more buyers? According to 96% of our top agents the answer is spending time preparing your property for home inspections.  By doing this well, 87% of agents believe it can boost the final sales price by up to 10%…and that is a lot of money!

Create an entrance

Your entrance is the first thing people see so you need to ensure you make a great first impression from the street so would be buyers are excited about coming in to take a closer look.

Here are some easy ideas to transform the front of your home – be warned though you’ll need to get your hands dirty.

Add a fence – If you don’t already have one – add a fence around your property. This allows you to separate your home from the street and will have the added advantage of making your front yard seem bigger.

A good front gate – Make sure your front gate is clean and in good condition – it’s the first thing people come in contact with.

Make sure you can easily see your home’s number and if possible add lights in case buyers do a drive by at night time.

Neat clean and cared for – Clean out your gutters and make sure your roof and windows are clean and free of spider webs.

Power wash your path and make sure it is swept before open home inspections. Spend some time weeding and trimming the garden beds. Maybe add some flowering plants to bring in a bit of colour. Make sure your lawn is mowed and any leaves are raked up.

Paint your garage door – visually this often takes up a lot of space so making it look great can make a big difference to your street appeal.

Having a neat and well cared for front garden –  this gets potential buyers excited about finding out more – that’s the feeling you are trying to create.

Keep garbage out of sight – Make sure your garbage bins are out of sight and clear out your letter box each day in case people are driving past – you want buyers to feel this is a loved and cared for home.

Add a path- If you don’t have an established path, consider laying one to help guide your buyers to your front door. Plain white pavers look great against a green lawn but there are many great options to choose from depending on what your budget and taste is like. They will make a big difference to your entrance.

Light me up – Ensure your outside bulbs are bright enough and working well, in case buyers do a drive by at night time. Make sure that the street or unit number is clearly visible and that the doorbell works.

Don’t have a front yard?- Make an impact by adding window planters, some clean shutters, good lighting and clearly visible house numbers.

Living room

The aim here is to make buyers feel good about being in your home. You want them to envisage themselves living in in your space.

Create a feeling of space – Today’s buyers like large open plan living. If your home doesn’t have a large living space, then you will need to make the most of the space you do have. Colour can help, receding colours like blues and greens can make a room appear bigger. How you finish a small room is also important. In a small room, especially one with low ceilings, keep furnishings below waist height and limit the number of pieces in the room. Clutter will make your small room look even smaller!

Careful positioning of the furniture – Show buyers how easy it is to live in your living space. These rooms are places for people to communicate and relax so make sure you arrange your room to demonstrate this. Consider traffic flow, conversation areas, access from seating to coffee or side tables and task lighting for work or reading areas.

Fix the flooring – Floors are an expensive part of any room to replace; buyers know this, so they will want to see quality flooring. It may not be economical to replace worn or inappropriate flooring before you sell, so make the most of what you have. Have your carpets professionally cleaned. Marked or damaged timber floors should be re-sanded and polished.

Highlight a feature in the room – One of the golden rules of interior design is that rooms need a focus. It could be a fireplace, or the view from your window of French doors. If you living space doesn’t have a natural feature why not consider a feature wall? Even if buyers don’t agree with your style, most will not have a problem with changing one wall.

House Inspection Checklist

If you don’t hire an inspector certified by ASHI (the American Society of Home Inspectors), you’re asking for trouble once you close on your house. It’s not just older homes that need to be inspected, either; a new home may still not be up to code or up to par. Your real estate agent can recommend reliable companies that will conduct a professional home inspection.

But there could be major issues clearly visible when you do your first or second walkthrough of a home, well before you make an offer. If the issues are major ones – and you’re paying enough attention to notice them – you can save yourself a lot of time and money by walking away even before you’re tempted to sign a purchase and sale agreement. If the issues are relatively minor, your own inspection will give you a preliminary idea of how much you’ll have to spend for small repairs or upgrades.

That’s one way that a home inspection checklist can help. Here are a few others. Not all inspectors are as diligent as you’d hope, some may not be on the lookout for specific issues that you consider to be deal-breakers – and quite frankly, home inspection reports are long, difficult to read and difficult to understand.

Here’s a list to help you through the entire process.

Yard

Is the lawn properly maintained, or are there patches or soggy areas?

Does the property slope away from the house, with good drainage? Is there any standing water?

Are the driveway and other paved areas cracked or uneven?

If there’s a septic tank, is it leaking?

Roof

Are any shingles missing, or are there patches where the roof may have leaked previously?

Are the chimney and flashing in good shape?

Are the gutters and downspouts in proper condition and do they drain as expected, or have they been neglected? (That could be a sign that the house hasn’t been maintained properly as a whole.)

Are the soffits and fascia in good shape?

Question for the owner: How old is the roofing?

Exterior

Is the foundation in good condition, or is it cracked or crooked?

Are there large trees (which would have large roots) near the home’s foundation?

Are there any signs of damage from insects or termites, or rotted wood?

Are the door frames all square, or are they sagging or bowed?

Does the garage door work properly?

Is the siding or stucco intact or loose, and is any damage visible? Is any paint chipped or fading?

Question for the owner: How old is the exterior paint job or siding?

Interior: General

Do all of the doors and windows work? Are the frames caulked or insulated?

Is there enough ventilation in every room?

Does the house smell of mold or smoke? Are there any other foreign odors?

Are the floors in good shape? Will any need restoration or replacement?

Are the ceilings even and intact? Are there signs of previous water damage from leaks? Will any ceilings need repainting?

Are there cracks in any walls or ceiling, or where the walls join the ceiling?

What is the condition of the wall coverings, drapes or curtains?

Do the electrical outlets work, are they grounded, and are there enough in each room? Do all the light switches work?

Are stairs and railings solid and sturdy?

Are carbon monoxide and smoke detectors installed?

Questions for the owner: Has there ever been a fire in the home? Has the home ever needed special treatment for insects or other pests? What type of, and how much, insulation is there in the walls and ceiling?

Interior: Attic

Does the roofing have water stains (a sign of previous leaks)?

Are there any droppings, wood shavings or other signs of rodents or insect infestations?

Is there enough ventilation and adequate insulation in the attic’s walls and floors?

Are there exposed wires or splices which could be fire hazards?

Interior: Basement

Are there signs of moisture or stains from previous flooding or leaks?

If there’s a sump pump, does it work?

Is there any cracking or flaking in the exposed foundation?

Is visible wood solid and soundly attached to the foundation? Any sign of insect damage?

If there’s a crawl space, is it adequately vented and insulated, with no signs of damage from water or pests?

Appliances

Which appliances (refrigerator, oven, dishwasher, washer/dryer, etc.) come with the house? Do they all work properly?

Question for the owner: How old is each appliance?

Subsystems

Do the heat and air conditioning work properly? Are there multiple units or heating/cooling zones? When were the filters last changed, and are outdoor cooling units rusty or rundown? (Proper care of heating and cooling systems are signs of proper home maintenance)

Do faucets, toilets and other plumbing fixtures work properly? Do they have adequate water pressure? Are there any leaks, rust, unusual noises or signs of neglect?

Is the water heater in good repair, and does it distribute adequate amounts of hot water throughout the house?

Is the electrical system up to code, with all cables secured and not exposed or spliced? Is the breaker panel (a fuse box is a red flag) easily accessible, working properly, in good shape and not on a recall list?

Are chimneys, fireplaces, duct work, dampers and flues in good condition? Have they been cleaned recently?

Is there an adequate exhaust fan in the kitchen? Do all installed ceiling fans work properly? Are any fans vented to the attic? (They shouldn’t be)

Questions for the owner: How old are the HVAC systems and water heater?

Additional Questions for the Owner

Is there a history of asbestos being used anywhere in the home?

Has the home been tested for radon?

The Father Of The Circuit Breakers

CIRCUIT BREAKER ANALYZER

the instrument platform for circuit breaker maintenance, based on more than 20 years’ experience of over 4,000 delivered breaker analysers. The modular construction makes it possible to configure the TM1800 for measurements on all known types of circuit breakers in operation in today’s power world.

The robust design contains powerful technology that streamlines circuit breaker testing. Sophisticated measurement modules enable great time savings as many parameters can be measured simultaneously, eliminating the need for new setup each time.

testing using the DCM module makes the testing safe and time saving by keeping the circuit breaker grounded on both sides throughout the test. The DCM module uses a measuring technology called Dynamic Capacitive Measurement.

Circuit Breakers

circuit breaker infrastructure allows prevention of actions that can cause a node to go beyond its capacity or to go down. The premise of circuit breakers is to ensure a higher quality of service and only accept request loads that are serviceable in the current resource configuration.

When To Use Circuit Breakers

Circuit breakers should be used when the user wishes to trade request throughput for a higher Solr stability. If circuit breakers are enabled, requests may be rejected under the condition of high node duress with an appropriate HTTP error code (typically 503).

The “enabled” attribute controls the global activation/deactivation of circuit breakers. If this flag is disabled, all circuit breakers will be disabled globally. Per circuit breaker configurations are specified in their respective sections later. This attribute acts as the highest authority and global controller of circuit breakers. For using specific circuit breakers, each one needs to be individually enabled in addition to this flag being enabled.

circuit breaker tracks heap memory usage and rejects incoming search requests with a 503 error code if the heap usage exceeds a configured percentage of maximum heap allocated (-Xmx). The main configuration for this circuit breaker is controlling the threshold percentage at which the breaker will trip.

CPU Utilization Based Circuit Breaker

This circuit breaker tracks CPU utilization and triggers if the average CPU utilization over the last one minute exceeds a configurable threshold. Note that the value used in computation is over the last one minute — so a sudden spike in traffic that goes down might still cause the circuit breaker to trigger for a short while before it resolves and updates the value.

Circuit Breakers: A Handy Guide for Homeowners

The switches on your circuit breaker board have the main function of offering a safe way to turn your electrical power ON and OFF in specific areas of the house so that maintenance or repair work can be carried out safely by qualified electricians. It also serves the important secondary purpose of triggering the circuit breakers that cut the power when an electrical issue such as a short circuit or a ground fault occurs. When these issues occur, they force too much electricity to flow through a single circuit than it is designed to handle. A lightning strike, although unlikely, also has the potential to supply your household wiring with too much voltage which can also trigger a circuit breaker in your home. However, many electrical faults that take place are due to internal factors such as an overloaded circuit or simply a blown lightbulb.

If you find yourself in a situation where your home or commercial building appears powerless, or if certain appliances and/or sections of lighting suddenly cut out and leave you in the dark, then it is most likely that the primary safety feature on your circuit breaker board has triggered and has interrupted the flow of electrical current running through your wiring, appliances and electrical feeds. Without the breaker’s built-in defence mechanism working effectively, powerful currents can overheat, cause electrical damage and can even catch fire. Of course, this would not only result in the need to replace the ruined circuitry and home appliances (at high cost), but in a worst-case scenario can also pose a risk to life. Therefore, discovering the cause of a tripped circuit breaker in your home or commercial property is important to minimise risk must but be done in a safe manner.

An Overloaded Circuit – a circuit overload simply means that the electrical current running through a single circuit in your home or office is too high in voltage for what the circuit was designed to carry. For example; overloading a single plug socket with a number of extension leads and multiple electrical appliances at the same time. The issue is also more likely to occur if the appliances plugged in collectively require a lot of power. If your circuit breaker has kicked in then this is a good sign, it’s doing its job of preventing electrical hazards from causing risk. You can resolve this type of issue by separating your electrical appliances across various plug sockets rather than running multiple appliances on one circuit. This will reduce the level of voltage to a safer and more manageable quantity for your wiring and electrical outputs.

A Short Circuit – short-circuiting comes as a result of incorrect wiring or faulty appliances, switches, plugs, receptacles or cords in your home or office that much like an overloaded circuit, will result in too strong of an electrical current for one single circuit to handle. It takes place due to the active (hot) wire coming into contact with either the neutral wire and/or another hot wire. When this happens, the electrical charge of each wire combines and causes an unsafe level of voltage that exceeds the circuits load capabilities. A sign of short-circuiting occurring is if the circuit breakers kick in continuously in the same area of the property. Also, if you notice a faint burning smell deriving from any electrical output then it is important to get in touch with a certified electrician immediately and definitely not to attempt to do anything about it yourself. In doing so they can then solve your electrical issue safely and can prevent a potentially harmful electrical hazard from taking place.

A Ground Fault – ground faults are similar to short circuits although differ as they occur when the active (hot) wire comes into contact with the walls of the protective metal box or a ground wire. This electrical hazard is particularly dangerous in areas of moisture such as bathrooms, kitchens or external outputs and so it is stated by the National Authority that homes should be fitted with Ground Fault Circuit Interrupters (GFCI) and should be used in conjunction with safety switches and outlets. If you discover a ground fault in your home then it is crucially important to have a certified electrician to come and assess this type of issue as it can easily cause electric shocks, electrocution (especially in damp areas), and can even start fires. Ground faults aren’t the easiest electrical fault to find symptoms for, but if you experience things such as; a small electric shock when you touch a metal surface, if your TV/computer screen displays strobing lines, if you hear a humming/buzzing noise from your TV or stereo set, or if your GFCI trips frequently, then these are all signs that you need to call for professional help to resolve the issue properly as soon as possible.

Air Circuit Breakers

Modern systems for low-voltage energy distribution, particularly those for regenerative applications, are more compact yet make higher demands on the integrated components.

meets these increased demands with new materials and a modified construction. Two compact sizes facilitate smaller switch panels. The modular design and common range of accessories allow simple integration. ‘Series NRX’ offers a high degree of functionality and

Advantages:

Modern circuit-breaker technology reduces system costs

The high-end multi-functional control unit (P type) with large colour graphic display facilitates all well-known applications

Modbus, Profibus, Ethernet and INCOM compatible

Engineering design simplified by reduction to just 2 sizes

Flexible and easy connection using the rotating connection adapter and associated connection options

Main applications:

System protection

Motor protection

Transformer protection

Generator protection

With the selection of the appropriate control unit, the switches are optimised for these applications and include comprehensive additional functions as standard or as options.

A Quick Guide: UL 489 or UL 1077

A common question that comes up with OEM machine builders and control panel builders is “How do I know when to use UL 1077 or UL 489 breakers in panels or equipment?” The answer is seemingly simple, but like most simple questions, there is usually some confusion. No one wants to be the only person in the room who puts up their hand and asks a question to which they believe “everyone else” knows the answer.

How do you assure that you meet the required standards? The following information should give you a better understanding of the standards that must be met — and how to meet those standards. The function of a circuit breaker is to provide overload (thermal) and short-circuit (magnetic) protection to a circuit and its downstream components. A circuit breaker functions like an airbag in a car, protecting circuit components and people by tripping the circuit to interrupt the current flow if it detects a fault condition in the control system.

What are UL 489 and UL 1077?

UL 489 Circuit Breakers

UL 489 circuit breakers are “intended for installation in a circuit breaker enclosure or as parts of other devices, such as service entrance equipment and panelboards.” They are regularly required on panel designs, per the National Electrical Code.

UL 1077 Supplementary Protectors

UL 1077 defines supplementary protectors as devices intended for use as overcurrent, over-voltage or under-voltage protection within an appliance or other electrical equipment where branch-circuit overvoltage protection is already provided or is not required.

UL Standards Comparison – UL 489 vs UL 1077

Under the UL services, low-voltage air circuit breakers, molded-case circuit breakers, and miniature circuit breakers are evaluated and “Listed” to UL 489 for use as a standalone product. By contrast, “Recognized” devices under UL 1077, Supplementary Protectors for Use in Electrical Equipment, are evaluated only for use as components in “Listed” products. In contrast to “Listed” circuit breakers, UL 1077 supplementary protectors are “Recognized” components. This means that they are investigated for factory installation in “Listed” products, such as a UL 508a panel.

Both UL 489 and UL 1077 devices must pass a series of calibration, overload, endurance and short-circuit tests. The UL 489 and UL 1077 Standards testing are similar, but the UL 489 testing is more rigorous. Unlike UL 489, a UL 1077 circuit protection device does not necessarily need to survive the test. See Figure 1, below, for a comparison of the testing.

Outsourcing Tax Preparation

What Are Tax Preparers?

A tax preparer is someone who will prepare, calculate and file your taxes. In some cases, the preparer can represent you if you’re facing an audit or if other problems arise. Some have a strong accounting background, while others may be very familiar with the law.

In short, a person who prepares taxes can have different roles and be known by different titles, such as:

Certified Public Accountant (CPA)

These professionals have passed an exam in their state, which qualifies them in accounting, and they must meet certain ethical standards of practice. A CPA not only prepares and files your tax return, but he or she may also help you with maximizing tax refunds and deductions for future returns. They might also help with other accounting needs you might have, and help you plan your financial future.

Tax Attorney or Lawyer

After completing their education and passing a state exam, attorneys may choose to specialize in different areas, including tax preparation and filing. A tax attorney may be especially helpful when there are complicated cases or you suspect you may need to legally defend yourself against the IRS or state tax department.

Enrolled Agent

These agents are licensed by the IRS directly, and have passed a comprehensive exam that qualifies them in tax planning and preparation. These agents also must complete continuing education every three years to hold onto their license.

The professionals listed above may represent you when talking to the IRS, and this could be helpful or — in complicated cases — necessary.

Other professionals, such as bookkeepers, consultants or advisors, may also be very knowledgeable or experienced in preparing and filing your return. However, they might have a few limits on being able to represent you.

Keep in mind that anyone who has applied and been granted a Preparer Tax Identification Number (PTIN) may file on your behalf. However, they cannot represent you when talking to the IRS.

Methods of Determining Tax Preparation Fees

The first factor in figuring out the cost of how much having your tax return prepared is investigating the various methods tax professionals use to determine the fees they charge.

Different tax accountants use different pricing methods for tax preparation. When you want to compare their rates, you could start by asking how they produce their fees. Alternatively, you can ask for an estimate of their tax services.

While some offer a free consultation, other accountants will only engage you when you’ve presented your tax situation to them. Since your summary may not be exact, the estimate may not reflect what you’ll end up paying.

Here are some of the methods tax professionals use in determining tax preparation fees:

1. Setting a Fee for Each Tax Schedule

With this method, there’s typically no room to negotiate the tax preparation fee. The fee is usually a flat rate that applies to each schedule or form. For a breakdown on the average cost of filing common forms, check out the following from the National Society of Accountants:

  • Form 1040 with Schedule A and state return: $273
  • Form 1040, non-itemized, with state return: $176
  • Schedule C (business activity): $184
  • Schedule D (gains and losses): $124
  • Schedule E (rental activity): $135
  • Schedule F (farm): $180

With the knowledge of these figures, you can properly estimate the cost of having your tax return prepared by a firm who bases their fees off of which forms you need filled out.

2. Fees Based on What They Charged the Previous Year

If you use the same service each year, you’re likely to get a matching rate. The cost of having your previous return prepared provides a good model for how much preparing your new return should cost. Your tax advisor will give you a similar price, as long as your taxes aren’t more complicated than in previous years.

3. Setting a Minimum Tax Preparation Fee

For returns that are fairly standard and aren’t too complicated, a tax professional may simply charge a minimum flat fee. They may then charge you an additional fee based on any hours worked over the usual hours other tax returns similar to yours require.

While the initial minimum fee may be low compared to some of the other methods in this list, be prepared for your final bill to potentially be a bit higher than the initial fee.

4. An Hourly Rate for Time Spent in Tax Preparation

If you approach a tax professional who charges by the hour, first find out how much time it’ll take to complete. Also, find out how much they charge by the hour. This will help determine whether you can afford their services or not. Some professionals have steep hourly tax preparation fees, sometimes charging hundreds per hour.

While such a high rate can easily make you think twice about working with such a firm, a high rate isn’t necessarily a bad thing when it comes to tax preparation.

A tax professional who charges a high hourly rate is likely to be an expert, and may only take a short amount of time to prepare your taxes. If the work takes a short amount of time to complete, you won’t be stuck with an immense bill.

Paid Software or Online-Subscription Services

While free tax programs might work for many people, you may prefer to purchase a tax-preparation-software product or use an online-subscription service. There are several reasons that a commercial product might be better for you:

Your taxes are too complex for many free options

You don’t want your private data collected

The up-selling pop-ups and ads in free products can be annoying

You don’t like the interface or bare-bones features of the free tax-prep versions

You are filing multiple returns for other taxpayers

Even if you start with a free option, it is smart to see what the providers charge for their paid products. You would want to know that in case your return needs a form not supported by the free version and you either must upgrade that product or start over.

In addition, you’ll want to consider the total cost of filing. For instance, OLT charges $7.95 for the federal return and between $7.95 and $9.95 for the state return. That total is less than other providers that charge nothing for the federal return and $19.95 or more for the state filing.

Tips for Cutting the Cost of Having Your Taxes Done

Many taxpayers stress about the size of their tax bills this time of year, but many more may be stressing about the size of the bill to calculate their tax bills. It now costs $188, on average, to have a tax preparer do a Form 1040, according to the National Society of Accountants. Itemize and add a state return, and the average rises to $294.

For many people, the struggle to find affordable, high-quality tax preparers is real, but experts say five things can help rein in the cost.

See if you can get free help

The IRS programs — Volunteer Income Tax Assistance (VITA) and Tax Counseling for the Elderly (TCE) — provide free tax prep services generally to people who make $56,000 or less, have disabilities, are older than 60 or speak limited English. This can be a huge money-saver if you qualify.

Read the contract

“Typically, tax preparers that want a long-term relationship with you will have some type of an engagement letter. That will help you understand how the preparer’s fees work, and it may give you a heads-up on whether there will be charges for things such as extra copies of your return.

Preparers can’t base their fees on a percentage of your tax refund amount, and they can’t charge you a separate fee for having the IRS direct-deposit your refund.

Ask for a break if you need it

Negotiating tax-prep fees isn’t very common, but sometimes it’s OK to ask for a discount.

“If you’re having a bad year and you’ve been with somebody for a long time and something’s happened, somebody’s lost a job, you’ve lost a spouse, you’ve had something that’s out of the ordinary, I think there’s nothing wrong with calling your preparer and saying, ‘Look, this is the bind I’m in this year. Is there anything you can do for me?

The Qualifications of the Tax Professional

On average, a tax advisor who’s starting off will charge less than a high-quality, professional one. When it comes to your taxes, the stakes are extremely high. Any mistakes will likely lead to trouble from the IRS and require corrections, or could even incur penalties.

If you’re already the subject of an audit, then consider hiring experienced tax defense attorneys to help defend yourself from tax penalties and even criminal charges.

Chances are that you’d rather spend more on quality and have the task done correctly than save a few bucks on fees and then wind up spending your time and money later on fixing mistakes and paying penalties. Plus, you wouldn’t want to miss out on any deductions or credits that an inexperienced tax preparer may overlook.

Although paying less for quality services is ideal, paying a higher fee may be worthwhile in the end for your own peace of mind.

Exactly What Kind Of Eye Care Professionals

Most Common Eye Problems

More than 4.2 million Americans aged 40 years and older are either legally blind (having best-corrected visual acuity of 6/60 or worse (=20/200) in the better-seeing eye) or are with low vision (having best-corrected visual acuity less than 6/12 (<20/40) in the better-seeing eye, excluding those who were categorized as being blind).

The leading causes of blindness and low vision in the United States are primarily age-related eye diseases such as age-related macular degeneration, cataract, diabetic retinopathy, and glaucoma. Other common eye disorders include amblyopia and strabismus.

Age-Related Macular Degeneration

Macular degeneration, often called age-related macular degeneration (AMD), is an eye disorder associated with aging and results in damaging sharp and central vision. Central vision is needed for seeing objects clearly and for common daily tasks such as reading and driving. AMD affects the macula, the central part the retina that allows the eye to see fine details. There are two forms of AMD—wet and dry.

Wet AMD is when abnormal blood vessel behind the retina start to grow under the macula, ultimately leading to blood and fluid leakage. Bleeding, leaking, and scarring from these blood vessels cause damage and lead to rapid central vision loss. An early symptom of wet AMD is that straight lines appear wavy.

Dry AMD is when the macula thins overtime as part of aging process, gradually blurring central vision. The dry form is more common and accounts for 70–90% of cases of AMD and it progresses more slowly than the wet form. Over time, as less of the macula functions, central vision is gradually lost in the affected eye. Dry AMD generally affects both eyes. One of the most common early signs of dry AMD is drusen.

Drusen are tiny yellow or white deposits under the retina. They often are found in people aged 60 years and older. The presence of small drusen is normal and does not cause vision loss. However, the presence of large and more numerous drusen raises the risk of developing advanced dry AMD or wet AMD.

It is estimated that 1.8 million Americans aged 40 years and older are affected by AMD and an additional 7.3 million with large drusen are at substantial risk of developing AMD. The number of people with AMD is estimated to reach 2.95 million in 2020. AMD is the leading cause of permanent impairment of reading and fine or close-up vision among people aged 65 years and older.

Cataracts

Characterized by a cloudy, milky white lens in the eye, most cataracts are age-related and more common in people over 50 (but can develop at any age). Cataracts can be the result of injury, UV exposure, or protein deterioration over time; this is what causes the eye’s lens to cloud. If left untreated, cataracts can ultimately cause severe vision loss.

Treatment: Fortunately, cataracts are a common eye problem that can be treated through surgery. Whether surgery is needed depends on the degree of vision loss and whether it affects your quality of life and ability to function.

Keratoconus

Normally, the cornea (the clear outer lens of the eye) has a dome shape, like a ball. Sometimes, however, the collagen which holds the cornea in place becomes weak, causing the cornea to become cone shaped. This condition is called keratoconus. This can cause serious loss of vision if not treated early and quickly. Left untreated, many people will need a cornea transplant.

Treatment: Treatment usually starts with eyeglasses. Contact lenses, usually rigid gas permeable ones, may be recommended to strengthen the cornea and improve vision. In addition, cornea collagen crosslinking is often effective to help prevent progression, as well as intacs (implants placed under the surface of the cornea to reduce the cone shape and improve vision). A last resort is a cornea transplant.

Diabetic Retinopathy

Diabetic retinopathy occurs as a result of prolonged high blood sugar associated with types 1 and 2 diabetes and can cause blindness if left untreated. Too much blood sugar can alter the blood vessels in the back of the eye, preventing the retina from receiving the proper amount of nutrients it needs to maintain vision. Anyone with diabetes type 1 or type 2 is at risk of developing diabetic retinopathy. However, the type of diabetes a person has, how often their blood glucose fluctuates, how well they control their sugars, and how long they have had diabetes all affects his/her risk.

Treatment: In most cases, laser surgery can prevent significant vision loss associated with diabetic retinopathy. A procedure called laser photocoagulation can seal or destroy growing or leaking blood vessels in the retina.

Glaucoma

Glaucoma is a group of diseases that can damage the eye’s optic nerve and result in vision loss and blindness. Glaucoma occurs when the normal fluid pressure inside the eyes slowly rises. However, recent findings now show that glaucoma can occur with normal eye pressure. With early treatment, you can often protect your eyes against serious vision loss.

There are two major categories “open angle” and “closed angle” glaucoma. Open angle, is a chronic condition that progress slowly over long period of time without the person noticing vision loss until the disease is very advanced, that is why it is called “sneak thief of sight.” Angle closure can appear suddenly and is painful. Visual loss can progress quickly; however, the pain and discomfort lead patients to seek medical attention before permanent damage occurs.

Strabismus

Strabismus involves an imbalance in the positioning of the two eyes. Strabismus can cause the eyes to cross in (esotropia) or turn out (exotropia). Strabismus is caused by a lack of coordination between the eyes. As a result, the eyes look in different directions and do not focus simultaneously on a single point. In most cases of strabismus in children, the cause is unknown. In more than half of these cases, the problem is present at or shortly after birth (congenital strabismus). When the two eyes fail to focus on the same image, there is reduced or absent depth perception and the brain may learn to ignore the input from one eye, causing permanent vision loss in that eye (one type of amblyopia).

What You Need to Know About Blindness

If you’re partially blind, you have limited vision. For example, you may have blurry vision or the inability to distinguish the shapes of objects. Complete blindness means you can’t see at all.

Legal blindness refers to vision that’s highly compromised. What a person with regular vision can see from 200 feet away, a legally blind person can see from only 20 feet away.

Seek medical attention right away if you suddenly lose the ability to see. Have someone bring you to the emergency room for treatment. Don’t wait for your vision to return.

Depending on the cause of your blindness, immediate treatment may increase your chances for restoring your vision. Treatment may involve surgery or medication.

What are the symptoms of blindness?

If you’re completely blind, you see nothing. If you’re partially blind, you might experience the following symptoms:

  • Cloudy vision
  • An inability to see shapes
  • Seeing only shadows
  • Poor night vision
  • Tunnel vision

What causes blindness?

The following eye diseases and conditions can cause blindness:

  • Glaucoma refers to different eye conditions that can damage your optic nerve, which carries visual information from your eyes to your brain.
  • Macular degeneration destroys the part of your eye that enables you to see details. It usually affects older adults.
  • Cataracts cause cloudy vision. They’re more common in older people.
  • A lazy eye can make it difficult to see details. It may lead to vision loss.
  • Optic neuritis is inflammation that can cause temporary or permanent vision loss.
  • Retinitis pigmentosa refers to damage of the retina. It leads to blindness only in rare cases.
  • Tumors that affect the retina or optic nerve can also cause blindness.

How is blindness treated?

In some cases of vision impairment, one or more of the following may help restore vision:

  • eyeglasses
  • contact lenses
  • surgery
  • medication

If you experience partial blindness that can’t be corrected, your doctor will provide guidance on how to function with limited vision. For example, you can use a magnifying glass to read, increase the text size on your computer, and use audio clocks and audiobooks.

Complete blindness requires approaching life in a new way and learning new skills. For example, you may need to learn how to:

  • read Braille
  • use a guide dog
  • organize your home so you can easily find things and stay safe
  • fold money in distinct ways to distinguish bill amounts

You can also consider getting some adaptive products, like a specialized smartphone, color identifier, and accessible cookware. There’s even adaptive sporting equipment, like sensory soccer balls.

How To Provide The Proper Care To Control Snake

How to Get Rid of Snakes Naturally

Most North American snakes are non-poisonous and good for our gardens, feasting on many of the pests that dig up our yards and damage our plants. However, that’s little consolation if you’re afraid of snakes or just plain don’t want them around your family and pets. If you’ve seen snakes around your home, and you’d like to get rid of them, try these natural methods.

Tall grass, brush piles, and stacks of junk are the perfect habitat for mice, rats, and insects, which makes them the perfect habitat for snakes, too. Eliminate these spots from your yard, and the snakes are likely to go elsewhere

Snakes eat moles, voles, mice, rats, crickets, slugs and a whole range of insects. If you have a known problem with any of these pests, work to correct it, so your yard is no longer an easy source of food.

Snakes will snatch eggs out of a chicken coop and bunnies out of a hutch, so if you have small backyard animals, know that snakes view them as another easy source of food. Take pains to secure your animal enclosures against predators, so snakes have one less reason to hang around your yard.

Some things to consider:

Wrap the entire cage in hardware cloth (including the floor).

Cover any vents in the wall or roof with hardware cloth.

Keep the door closed at all times, so they don’t have an easy point of entry.

Repair/replace damaged boards, roofing material, and hardware cloth swiftly, so there aren’t any vulnerabilities.

Snakes

What are snakes?

There are more than 3,000 species of snakes worldwide, and these reptiles are one of the most feared on the planet. However, in nature, snakes are incredibly beneficial by feeding on a variety of smaller animals, including rodents, and helping to control their populations.

The dry, hot desert climate and throughout allows these cold-blooded animals to thrive. Being cold-blooded means that their body temperature mimics the temperature outside. When the weather is warm, snakes are active, and when the weather is cold, they hibernate because they are unable to digest food

Are snakes dangerous?

Other species like the corn snake and night snake are less of a threat. Even though they will bite when defending themselves, their venom is not strong enough to cause health problems in people. Due to the large number of dangerous venomous snakes in our area, if you are bitten by a snake and you are unsure of its species, it’s a good idea to seek medical attention.

Another problem with having snakes on your property is the emotional toll it can take. Many people have a phobia of these slithering reptiles, and for good reason! Snakes hide out of sight, and people often come into contact with them accidentally. It can be very stressful knowing that snakes are on your property and not know when or where you may come across one.

Why do I have a snake problem?

Snakes are a significant problem for property owners in our area because they thrive in the hot weather. If your yard provides snakes with a lot of places to hide and abundant sources of food, it will be more attractive to these reptiles.

Snake bites

What to do while you’re waiting for help

Do

stay calm, most snake bites in the UK are not serious and can be treated

keep the part of your body that was bitten as still as you can

lie in the recovery position if you can

take paracetamol for any pain

try to remember the colour and pattern of the snake to tell the doctor

take off any jewellery and loosen clothes near the bite, in case it swells

Don’t

do not go near the snake, or try to catch or kill it

do not try to suck or cut the poison (venom) out of the bite

do not tie anything tightly round the part of the body where the bite is

do not take aspirin or ibuprofen, as they can make bleeding worse

What happens at the hospital

You will usually need to stay in hospital for at least 24 hours if you have been bitten by a snake. The bite will be cleaned and bandaged. You may be given an injection to help protect you from tetanus.

If you were bitten by a poisonous (venomous) snake you will be treated with a medicine to fight the venom. This is given through a thin tube into a vein, called a drip.

The adder is the only venomous snake, but you should get all snake bites checked as soon as possible. Telling the doctors the colour and pattern of the snake that bit you could help them treat it.

Snakes Information

Some snakes can benefit the yard and garden. Snakes are one of nature’s most efficient mousetraps, killing and eating a variety of rodent pests. While snakes will not eliminate pests, they do help keep their numbers in check. Some harmless snakes (such as king snakes and coachwhips) eat other snakes, including poisonous ones.

Although you wouldn’t want a poisonous snake around your home, snake venom can be beneficial in developing a variety of human medicines. Researchers are conducting studies using snake venom to develop treatments for blood and heart problems. Snake venom also is being investigated for controlling some types of harmful bacteria.

Snake Biology

Snakes are ectotherms, meaning they control their body temperature by absorbing or giving off heat. Because their body temperature is affected by environmental temperatures and varies with surrounding conditions, snakes become inactive during very hot and very cold times of day and seasons. During periods of inactivity, snakes can go for several weeks without eating

Because they are cold-blooded, snakes must rely on their behavior to regulate body temperature. During the hot part of the day, snakes move to shaded areas. On cool days, they sun themselves in warm, open areas. Snakes often seek out paved roads, where they are attracted by heat from the road surface.

Because snakes have a backbone, they are classified as vertebrates. Among other vertebrates like fish, mammals, birds and people, the snake’s skeletal system is unique. Snake bones are very light and the skeleton is highly flexible. The lower jaw and skull are connected by a piece of stretchy material (ligament) that allows the snake to open its mouth very wide and move each jaw independently. Thus, snakes can swallow prey much larger than their head by “walking” their mouth around the food from side to side in a forward movement.

Snake Repellent: How to Get Rid of Snakes

Home owners are often faced with hard-to-manage pests, and perhaps the most difficult to deal with are snakes. Proper snake control isn’t the easiest of tasks: you need a basic knowledge of snake repellent application as well how to effectively employ snake traps and snake fencing. What’s more, there are also natural snake control options (in the form of all natural snake repellents and snake deterring animals) for you to consider.

In this guide, we’ll delve into how you can keep snakes away with the help of snake repellent, snake traps, snake poison, natural snake repellent, snake fences, and much more.

How to Get Rid of Snakes

Snakes are an integral (and often unavoidable) part of rural or recently rural environments. They cause very few problems and, aside from their venomous representatives, do not generally represent a threat to humans or their pets.

In fact, snakes are effective in managing populations of several other common pests, especially mice and certain types of insects. Even so, many home-owners consider it unsettling to know that their property is home to one or more snake species.

Evaluate Your Situation & Eliminate Hiding Places

If you’ve come across a snake in your house, chances are that you’ll find more on your property. It’s therefore important to actively search for areas that are attractive to snakes. This initial assessment will allow you to eliminate or minimize any snake habitat around your home (places where snakes can find food and shelter).

Truck Tires Defects

How Buying Commercial Truck Tires Can Save You Money

Commercial truck tires in order to be chosen carefully because they are acustomed on trucks that are utilized in businesses or commercial purposes. The actual truckers exert extra effort in the quest to find the right ones for their trucks.

Buying quality tires preserves money general health last longer and are more durable than inexpensive added wheels. This means you do not have to keep buying new tires every time inferior tires break in. Buying more often is more than buying expensive ones now but not buying again for years after who seem to.

Inferior tires may be cheaper but once it breaks down, it will cost you through buying expensive tires primarily. Commercial trucks often carry important loads and but if your truck breaks down, you might not be capable of making that important delivery, thus, making you lose money and clients as good. This would be bad for business and will often make you lose well over the price expensive auto. Quality tires can enhance the performance of the truck and will often make deliveries on time or even earlier.

Expensive truck tires produces your travel smoother because it has better treads. Quality tires have better rolling resistance which is why you reduce the use of acceleration when traveling time, anyone save cash on fuel also. Remember that fuel pricing is very unpredictable and often on fuel is every driver’s dream come genuine.

Tips for Buying The Right Commercial Truck Tires

Tips for Buying The Right Commercial Truck TiresIn trucking operations, one of the most critical purchases is often taken for granted – the type of commercial truck tires to install. Truck tires are not all the same and making the right choice can save you hundreds or thousands of dollars per truck, while just buying the same brand or model of tire or making the wrong choice can cost you that much – or more.

With so many options in commercial truck tires to choose from, how do you know which is right? Have your on-the-road needs, routes, driving conditions or loads changed since the last set of tires you purchased?

1- Choose based on route and driving application.

Tires are designed to operate with specific applications in mind. There are specific tread designs, rubber compounds, and tire construction for long haul routes, regional routes, urban settings, and on/off road needs. If a tire is being used in the wrong application it will not perform as you may need and can possibly prematurely wear. For example, if tires designed for long haul are used in an urban setting the tread will prematurely scrub off.

2- Check the weight rating.

This might seem obvious, but don’t overlook it. Make sure your tires have a weight rating compatible with your truck and load.

3- Get a warranty.

Whenever possible, make sure the tires you get are backed by warranties. That’s extra insurance against manufacturer defects and helps guarantee you get plenty of years of usage out of your new truck tire purchase.  Most major brands guarantee 7 years and 3 retreads.

4- Sometimes a retread is the right answer.

If your current tires are only showing some signs of wear and the casings are in good shape, you might not need new tires at all. Modern tire retreading is safe, effective, and has an extremely favorable ROI. You can get a retread for less than half what a new tire costs while restoring your current tires. !

5- Never buy used except in true emergencies.

The cost/benefit ratio on used tires just isn’t there. You don’t know how the tire was utilized by the previous owner or under what conditions they were ran.. They could even fail at critical moments, leaving you stranded. If there’s been a blowout and there’s no choice but to buy used, do what you have to do – but swap them out for new or retreaded as soon as possible.

PERFORMING QUALITY INSPECTION

After you’ve done the initial due diligence, you can proceed to examine the details of truck’s overall quality. Here are some of the finer points to inspect when it comes to buying a quality used truck.

CHECK THE OIL

As part of your quality inspection, check the existing oil situation. This includes looking at the current oil levels as well the condition of the oil. Both the engine and transmission oil status can be a further indicator of the overall health and condition of the truck.

LOOK FOR BODY RUST

Continue inspecting the vehicle’s quality by looking for rust on the exterior surfaces as well as within the structure of the vehicle. Check the doorframes and other parts for signs of structural rust. This could indicate the vehicle hasn’t been well-maintained and may not have much life left.

When examining the surface for rust, look for raised spots on the paint. If you find these patches, especially on the roof, they may indicate rust underneath.

LOOK FOR BODY DAMAGE

This may seem obvious, but don’t overlook any possible body damage. To avoid missing any deficiencies, be sure to only inspect the truck outdoors and in daylight.

CONSIDER THE TRUCK’S MILEAGE

The truck’s mileage can also be a good indicator of the overall quality of the vehicle when considered with other factors. Knowing the engine model can help indicate at which mileage point an engine rebuild may be required.

When looking at the mileage you’ll want to consider your own use for the truck. If you’re planning on driving frequently over long distances, it may make more sense to look for a truck with lower mileage.

However, a vehicle with high mileage doesn’t necessarily remove it from the running. If the truck has been consistently well cared for, it may still have a lot of life left in it.

INSPECT THE TIRE TREAD

When purchasing a used truck, it’s easy to overlook certain parts because you may become focused on mechanical issues and maintenance history. But don’t forget to look at the tires during your own inspection. As part of your thorough research, remember to examine the tread left on the tires. Find out:

  • How many miles have been put on the current tires
  • When they should be due for replacement.

Without taking this into consideration ahead of time, it could mean yet another upcoming investment you’ll need to make when buying a used truck.

Assessing the mechanical operation

Once you’ve inspected the quality of the truck, including its exterior and interior condition, you’ll want to get to know it from a mechanical and operational standpoint. You’ll need to be clear on what your primary use for the truck will be and find the right match. Use these steps to assist you in the assessment.

SELECT THE BEST AXLE LAYOUT

Consider the type of axle layouts and configurations that are available. Depending on the load you’re carrying, there are different layouts that are more appropriate for each scenario:

Are you hauling goods long distances throughout difficult terrain?

Or are you making shorter more frequent trips?

If you’re uncertain, consult an expert to make the right purchase for your needs.

DETERMINE THE RIGHT HORSEPOWER AND TOWING CAPACITY

Another important consideration for your specific needs is the amount of engine horsepower and towing capacity the truck has. If you’re towing construction equipment such as excavators, then you won’t require the same power as you would need for long-distance commercial trailer towing. Be sure to inquire specifically about the truck’s capacity and if it will meet your own towing requirements.

CONSIDER TRANSMISSION TYPES

Commercial trucks are available in both automatic and manual transmissions, which could be yet another decision to make. It may come down to a personal preference. Take into consideration the transmission type and what you’ll be most comfortable with before moving on your used truck purchase.

ASK AN EXPERT

If you don’t feel comfortable assessing the mechanics and quality of the truck on your own, it’s a good idea to bring in a certified truck mechanic. As an expert, the truck mechanic will be able to point out things you may have overlooked. A mechanic will also be able to make recommendations about the specs of the truck to meet your needs.

Want to Lift Your Truck or Jeep? Here are Some Things to Keep in Mind

Truck and Jeep drivers tend to get lift kits for a couple reasons. The first reason being the driver is a serious and extreme off-roader who will be trekking through rough terrain quite a bit, the other reason is that they like the agressive look. Lift kits can be really beneficial and good looking, however there is a lot to consider when adding one to your vehicle. If you plan on adding a lift kit to your truck or SUV, check out some must know dos and don’ts below.

Basic Dos and Don’ts of Lift Kits

  • Do get a new lift kit from a reputable company like Mopar.
  • Don’t purchase a lift kit used or without doing research on the company/brand before hand.
  • Do get the kit professionally installed.
  • Don’t try to figure out how to install it on your own, especially if you have never done it before.
  • Do make sure you do your research so you purchase the right kit, size, and so on.
  • Don’t buy the first kit you find or skip the research to know which size fits your needs (one-inch being the smallest), which kit fits your vehicle, and what type of kit is best for you.

Things to Keep in Mind

Aside from the dos and don’ts there are many things to keep in mind when searching for the ideal lift kit and having it installed. First of all, a lift kit is more than just a mechanism to make your truck higher. Usually with a lift you need new tires and wheels, sometimes a new suspension, and always you need someone to recalibrate your vehicle’s computer.

Also, a lift kit will likely affect the drive of your vehicle. The higher you go, the rougher the ride, so expect the ride to be not as smooth.

Lifting and adding new tires, no matter how low or high, will affect your fuel economy. If you are one of those people that already complain about your truck or SUV being bad on gas, you may want to reconsider getting a lift kit.

Finally, keep in mind lift kits aren’t cheap! Between the kit, the parts, the wheels and tires, and any other parts it will cost you likely over $2,000. Not to mention, you need to consider time and labor it will take a service employee to modify your vehicle.

We are not trying to discourage you from getting a lift kit. Lift kits can be extremely beneficial to someone who off-roads through rough terrain and they can look awesome. Just make sure to keep in mind the dos and don’ts, and get a good kit installed by a professional when you go to do it!